


SW900 LCD Display: Complete Setup & User Guide
The SW900 is the LCD display included as standard in every All4eBikes MTX conversion kit. This guide covers everything: screen zones, riding modes, all three button operations, the complete error code table and every P01–P16 parameter explained.
Contents
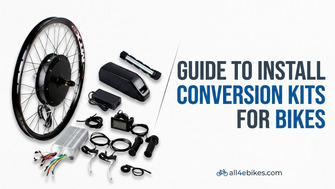
This guide is part of our complete e-bike conversion kit installation guide — if you're still fitting your kit, start there for the full step-by-step process. The SW900 communicates directly with your controller via UART, so it's worth understanding both components together once your kit is wired in.
What is the SW900 display
The SW900 is an LCD display with an ABS shell and a high-hardness acrylic screen — equivalent hardness to tempered glass. It shows real-time speed, PAS assist level, battery status and additional data in the multi-function zone. It communicates with the controller via the UART protocol and supports 24V to 72V systems, with the system voltage selectable in parameter P03 (24V / 36V / 48V / 52V / 72V).
In All4eBikes MTX kits, the SW900 arrives configured for the kit; before the first ride, just check that P03 matches the voltage of the battery you chose, since the battery is bought separately. That said, understanding the advanced settings lets you tune the kit's behaviour to your bike and riding style precisely.
Connector wiring reference
The SW900 uses a 7-wire connector. For reference when connecting or troubleshooting:
| Wire colour | Function |
|---|---|
| Red (D+) | Power positive |
| Black (GND) | Power negative |
| Blue (DS) | Controller electric door lock |
| Brown (DD+) | Lighting control positive (if controller supports it) |
| Green (RX) | Communication receive |
| Yellow (TX) | Communication transmit |
| White (GND) | Lighting control negative |
Screen zones explained
The SW900 screen is divided into functional zones. Here is what each area shows:
- Current speed in km/h or mph
- Maximum speed (MAX) — switchable
- Average speed (AVG) — switchable
- Battery level indicator (bar graph)
- Undervoltage warning display
- Active PAS level (0–9)
- Cruise control active indicator
- Headlight indicator
- ODO — total distance
- TRIP — current trip distance
- WATT — instantaneous power
- Maintain — service reminder
- Error — active error code
Riding modes
The SW900 supports five riding modes, switchable via parameter settings or directly while riding:
- ECO (Economic): minimum power draw, reduced assist, maximum range. Best for flat urban commuting at low speed.
- STD (Standard): the default mode. Balanced power-to-consumption ratio for everyday mixed-terrain use.
- POWER (Powerful): maximum available power, higher consumption. Use on hills or with heavy loads.
- SPEEDHANDLE (Hand Speed Control): speed controlled exclusively by the throttle, PAS disabled. Enabled via P10=1.
- WALK (Walk assist): provides exactly 6 km/h of assist to walk the bike alongside you — useful on stairs, in narrow spaces, or when pushing uphill.
The active mode is reflected in the PAS zone. WALK mode can only be activated when the bike is stationary (hold the button, release to exit).
Three-button operation
The SW900 has three buttons: M (Mode/Menu), + (Plus/Up) and − (Minus/Down). “Short press” means under 1 second; “long press” means 2–3 seconds.
- Short: cycle multi-function zone data (ODO → TRIP → WATT → Error)
- Long: power screen on / off
- Up + Down together, 3–4 sec: enter settings menu P01–P16
- Short (riding): PAS level +1
- Short (in settings): increase parameter value
- Long: cycle speed display — current / MAX / AVG
- Long (at P16): turn headlight on
- Short (riding): PAS level −1
- Short (in settings): decrease parameter value
- Long (bike stopped): activate WALK 6 km/h (release to exit)
- Long: toggle headlight on / off
Inside the settings menu: short press M moves to the next parameter; short press + or − changes the value. Long press M saves and exits. If no button is pressed for 10 seconds, values are saved automatically and the menu closes.
Error codes
Error codes appear in the multi-function zone of the screen. Code 0 is the normal state. Any other number indicates a specific condition:
| Code | Status | Recommended action |
|---|---|---|
| 0 | Normal — no error | — |
| 1 | Save operation active | Informational, no action needed |
| 2 | Brakes applied — motor cut off | Release brake levers |
| 3 | PAS issue (not implemented) | Not active in current firmware |
| 4 | 6 km/h cruise (WALK) active | Informational — WALK mode is on |
| 5 | Real-time cruise control active | Informational — cruise engaged |
| 6 | Battery undervoltage | Charge battery. Verify P03 matches your battery voltage |
| 7 | Motor fault | Check motor-to-controller connections |
| 8 | Throttle fault | Check throttle wiring. Possible short circuit |
| 9 | Controller fault | Check controller power supply and wiring |
| 10 | Communication receive error | Check RX (green) wire between display and controller |
| 11 | Communication transmit error | Check TX (yellow) wire between display and controller |
| 12 | BMS communication error | Check battery connection and BMS status |
| 13 | Headlight fault | Check headlight wiring and white (GND) lighting wire |
Common display problems and fixes
Not every display issue produces a numbered error code. These are the symptoms installers and riders ask about most:
Screen stays completely blank
Long-press M for 2–3 seconds first — the display may simply be powered off rather than faulty. If nothing happens, check the red (power) and black (ground) wires at the display connector for a secure connection, then confirm the connector is fully seated at the controller end too. A blank screen with no response to any button almost always traces back to a power-wire fault rather than the display unit itself.
Screen flickers or resets while riding
This is typically a loose connector working intermittently over vibration, rather than a display fault. Check that the connector is clipped in fully and that the cable isn't being pulled taut at full handlebar turn — leave a small amount of slack in the cable run between the display and the frame.
Buttons are unresponsive or register the wrong action
Cold weather can make the button membrane feel stiffer and require a firmer press — this is normal down to around freezing. If buttons don't respond at all even with a firm press, or if a short press consistently acts like a long press, the display unit itself may need replacing.
Speed reading looks obviously wrong
Check parameters P06 (wheel size) and P07 (speed sensor magnets) first — a wheel size entered as 26" when your wheel is actually 29" will make every speed and distance reading inaccurate by a predictable, fixable margin. See the calibration notes below.
Settings parameters P01–P16
Enter the menu by pressing Up + Down together for 3–4 seconds. Navigate with short M. Adjust with + / −. Save and exit with a long press on M.
| Param | Function | Values / Notes |
|---|---|---|
| P01 | Backlight brightness | 1 = darkest, 3 = brightest |
| P02 | Distance unit | 0 = Kilometres (KM), 1 = Miles (MILE) |
| P03 | System voltage | 24V / 36V / 48V / 52V / 72V. Default: 36V. Set it to the nominal voltage of your battery. |
| P04 | Sleep / standby time | 0 = no sleep; 1–60 = minutes until auto-sleep |
| P05 | Number of PAS levels | 0 = 3 levels (2V / 3V / 4V); 1 = 5 levels (2V / 2.5V / 3V / 3.5V / 4V) |
| P06 | Wheel size | In inches, precision 0.1. E.g.: 26.0, 27.5, 29.0 |
| P07 | Speed sensor magnets | Range: 1–100. Check your kit specifications |
| P08 | Speed limit | 0–50 km/h. 50 = no limit. Applies to PAS; throttle may not be limited depending on communication mode. |
| P09 | Zero start / Non-zero start | 0 = Zero Start (pedal before motor engages); 1 = Non-zero Start (motor engages immediately) |
| P10 | Drive mode | 0 = PAS only; 1 = throttle only; 2 = PAS + throttle (throttle disabled at zero start) |
| P11 | PAS sensitivity | Range: 1–24. Lower values = faster motor response to pedalling |
| P12 | PAS start power | Range: 0–5. Power level at which motor engages on first PAS signal |
| P13 | PAS magnet type | 5, 8 or 12 magnets. Check your PAS sensor (standard: 12) |
| P14 | Controller current limit | Default: 12A. Range: 1–20A. Increase gradually if you need more torque |
| P15 | Not implemented | Reserved. Do not modify. |
| P16 | Reset odometer (ODO) | Long-press M for 5 seconds to reset total distance to zero |
Practical setup tips
Initial configuration for All4eBikes MTX kits
After installing the kit, verify and adjust these parameters:
- P03 → your battery voltage: MTX kits run on 36V to 72V depending on the kit and the battery you choose. The display ships set to 36V by default — set P03 to your battery's nominal voltage (for example 48V or 52V) for accurate battery level readings.
- P06 → your wheel size: Enter the exact diameter in inches (26.0, 27.5 or 29.0) for a precise speedometer.
- P08 → match your kit: the 250W kit is specified with assist limited to 25 km/h, so 25 is its natural setting. On the 500W to 3000W kits, set a higher value, or 50 to remove the software cap entirely, so the kit can reach its rated top speed: up to 35 km/h on the 500W, 50 km/h on the 1000W and 60 to over 80 km/h on the 1500W to 3000W kits.
- P05 → 1 (5 PAS levels): Gives finer control over assist than the default 3-level mode.
Speed limit: PAS vs throttle
The speed limit in P08 behaves differently depending on communication status. With active UART communication (supported controller), the limit applies to both PAS and throttle. Without communication, the limit applies to PAS only — the throttle is unrestricted. In both cases the speed accuracy is ±1 km/h.
When switching from km/h to mph in P02, the display converts correctly but the value stored in P08 remains in km/h internally. If you set a speed limit, update P08 after changing units.
Calibrating for accurate speed and distance
The SW900 calculates speed from wheel rotations detected via the Hall sensor magnets, combined with the wheel size you enter in P06. Two things affect accuracy:
- Wheel size (P06): enter the actual outer diameter of your wheel with tyre fitted, in inches to one decimal place. A 27.5" wheel entered as 26" will under-read speed and distance by roughly 5–6%.
- Magnet count (P07): must match the number of magnets on your speed sensor ring. Using the wrong count throws off the speed calculation independently of wheel size — check your kit's sensor specification if unsure.
Once both are set correctly, the SW900's speed accuracy is rated at ±1 km/h — accurate enough for everyday riding, but not intended as a precision cycling computer replacement.
SW900 vs UKC1+: which display should you choose
The SW900 is the default display in All4eBikes MTX kits, but the UKC1+ is available as an upgrade for riders who want more information visible at once.
| Feature | SW900 | UKC1+ |
|---|---|---|
| Screen type | LCD, segment-style | 3.5-inch colour TFT IPS screen, more simultaneous data fields |
| Buttons | 3 (M, +, −) | 3, same core logic |
| Protocol | UART | UART — compatible with the same controllers |
| Included as standard | Yes, in all MTX kits | No — optional upgrade |
| Best for | Riders who want the essentials clearly shown | Riders who want ODO, TRIP, WATT and speed visible together without cycling through screens |
Both displays use the same UART protocol and connector pinout, so swapping from SW900 to UKC1+ on an existing kit is a straightforward plug-and-play change — no controller reconfiguration is required beyond re-entering your P01–P16 preferences on the new unit.
No separate purchase needed. If you need it as a spare or want to upgrade to the UKC1+ (larger screen, more simultaneous data), find it in the accessories section.
eBike Parts & Accessories → Kits with SW900 included →Frequently asked questions
How do I turn the SW900 display on or off?
Long-press the M (Mode) button for 2–3 seconds. The first long press powers the screen on; the second powers it off. Once on, the display enters active mode and shows all data immediately.
How do I access the P01–P16 settings menu?
Simultaneously press and hold both the M and + buttons for 2–3 seconds until the settings menu appears. Navigate between parameters with a short press on M; adjust values with + or −. Long-press M to save and exit, or wait 10 seconds for auto-save and auto-exit.
What does error code 6 mean on the SW900?
Error 6 means battery undervoltage — the battery is too discharged to operate safely. Charge it before riding. If the error appears with a full battery, enter settings and check P03 — it must match your actual battery voltage (24V, 36V, 48V, 52V or 72V). Mismatched voltage is the most common cause of false E6 errors.
How do I switch units from km/h to mph?
Enter the settings menu and navigate to P02. Set the value to 1 for Miles. The speed display and distance counters will convert automatically. Note: the speed limit stored in P08 remains in km/h internally — update it too if you want an accurate mph speed limit after switching units.
Is the SW900 compatible with All4eBikes MTX kits?
Yes. The SW900 is included as standard in all MTX conversion kits on all4ebikes.com. It communicates with the controller via UART and comes configured for the kit’s motor. For basic use, the only check needed is that P03 matches your battery voltage — after that the kit is ready to ride.
Can I upgrade from SW900 to UKC1+ later?
Yes. Both displays use the same UART protocol and connector pinout, so swapping is plug-and-play on any All4eBikes MTX kit. After swapping, re-enter your P01–P16 settings on the new display, since parameters aren't transferred automatically between units.
Why does my speed reading look wrong after changing my wheel?
This is expected until you update parameter P06 to match your new wheel's actual diameter. The display doesn't detect wheel size automatically — it uses whatever value is stored, so speed and distance will be off by a predictable margin until you correct it.
Does the display work if my controller has a different amperage?
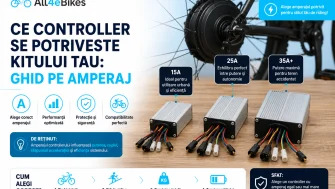
Yes. The display communicates with the controller over UART regardless of the controller's amperage rating — amperage is a power spec, not a communication spec. Any All4eBikes controller from 17A through 60A works with the SW900 without additional configuration. See our controller amperage guide if you're choosing or replacing one.
Reviews