


Conversion Kit for Fat Bike: What You Need to Know
Converting a fat bike to an electric fat bike is possible, but there are a few specifics you need to know before ordering: wheel size, dropout width, axle type, motor choice and the importance of the torque arm. This guide covers everything that matters, from compatibility checks through winter riding and long-term maintenance.
Contents
What is a fat bike
A fat bike is a bicycle with extremely wide tyres — typically between 3.8 and 5 inches wide, mounted on wide rims of 3–4 inches. This tyre width provides excellent traction on snow, sand, mud and unstable terrain where a standard bike would slip or sink. The larger air volume also runs at much lower pressure (often 5–12 psi), which lets the tyre deform around obstacles instead of bouncing off them.
Fat bikes were originally built for winter and desert expeditions, but they've become popular for trail riding, bikepacking and simply as a comfortable, forgiving platform for riders who want extra stability. Adding a motor turns a fat bike into a genuinely capable all-terrain electric vehicle — but the extra weight, rolling resistance and traction of the tyre change several of the assumptions that apply to a normal conversion kit installation.
Standard fat bike diameters:
- 26 inch x 4" — the most common, classic fat bike MTB
- 27.5 inch x 3.5–4" — newer format, faster on mixed terrain
- 29 inch x 3" — plus-size, more between fat and standard MTB
If you're completely new to conversion kits and want the broader picture before diving into fat-bike specifics, our beginner's guide to the e-bike conversion kit market is a good starting point.
Compatibility with the conversion kit
Good news: the rim diameter (26", 27.5" or 29") is what matters for the kit, not the tyre width. The kit comes with a pre-built rim and motor in the hub. Your wide tyre fits onto this new rim exactly as it did on the original.
✓ Fat bikes compatible with MTX kits:
Fat bike with a 26-inch rim (ETRTO 559) → select the 26" kit. Fat bike with a 27.5-inch rim (ETRTO 584) → select the 27.5" kit. Your original 4" tyre mounts directly onto the kit rim. Note the sizes per kit: MTX kits come in 26", 27.5" and 29" depending on power — the 500W kit only in 27.5" and 29", the 3000W kit only in 26" and 27.5", and the 250W, 1000W, 1500W and 2000W kits in all three.
The one additional aspect to check is the rear dropout width. Fat bikes may have rear dropouts of 135mm (standard) or wider (170–190mm), since the frame needs extra clearance for the wide tyre. Standard MTX kits are for 135mm. If your frame has wider dropouts, contact us before ordering — we can advise on spacers or an alternative axle configuration rather than risk an order that doesn't fit.
Also check disc brake rotor clearance. Some fat bike frames route the chainstay and seatstay very close to the hub flange to keep the wheel centred under the wide tyre. On a handful of frames, the motor's stator housing (which is slightly wider than a standard rim's hub shell) can sit close enough to the rotor or chainstay to need a thin spacer. This is uncommon but worth a visual check before your first ride, not after.
Axle type: quick-release vs thru-axle
Fat bikes are split roughly evenly between two rear axle systems, and the axle type decides whether the standard MTX kit fits: MTX kits use a 135 mm quick-release rear axle.
| Axle type | How it works | What to check |
|---|---|---|
| Quick-release (QR) | A skewer with a lever clamps the wheel between two dropout faces | Standard on most older and mid-range fat bikes; works with the standard MTX kit axle |
| Thru-axle | A threaded rod passes through the frame and screws into the opposite dropout | Common on newer fat bikes; diameter (12mm, 15mm) and thread pitch vary by brand — confirm before ordering |
If your fat bike uses a thru-axle, measure the axle diameter and the distance between the inner dropout faces (the "over-locknut dimension" or OLD) before ordering, and send us the numbers if you're unsure. Getting this wrong is the single most common reason a wheel doesn't seat properly on a first fat bike installation.
Why the torque arm is mandatory
Fat bikes have superior traction compared to standard bikes precisely because of their wide tyres gripping the surface. This traction means the motor transmits higher torque to the wheel than on a standard-tyre bike, because the tyre simply doesn't slip the way a narrow tyre would under hard acceleration.
Without a torque arm, the motor axle can spin in the dropout under hard acceleration or at high power — damaging both the frame dropout and the motor axle. The failure mode is gradual at first (the axle flats get slightly rounded, the wheel sits a millimetre off-centre) and then sudden: eventually the dropout slot elongates enough that the axle can shift under load, which can lock the wheel or damage the dropout beyond repair. On a fat bike, the risk is higher than on a standard bike precisely because the extra traction means more torque reaches the ground instead of being absorbed as wheel spin.
△ Important: torque arm required from 1000W
Every MTX kit includes two torque arms with clamps. On any fat bike with a 500W or more powerful kit, fitting them is mandatory for safety and motor longevity; they install in 10–15 minutes per side. A spare torque arm set is available in our e-bike parts range if you ever need a replacement.
Aluminium dropouts (common on entry-level and mid-range aluminium-frame fat bikes) are softer than steel and deform faster without a torque arm. Steel-frame fat bikes are more forgiving but not immune — we still recommend the torque arm on any motor above 500W regardless of frame material.
Which motor type suits a fat bike
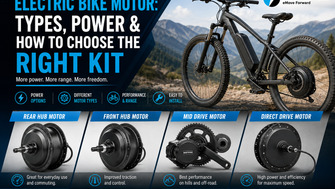
All MTX conversion kits, including the ones you would fit to a fat bike, use a gearless direct-drive rear hub motor. Here is how it compares with the other motor types you will see on the market:
| Motor type | Fit for fat bike use | Trade-off |
|---|---|---|
| Geared hub motor | Lighter, strong low-speed torque; not offered in the MTX range | Slightly more internal wear parts (nylon gears) than direct-drive |
| Direct-drive hub motor | The MTX motor: no internal gears to wear and near-silent, with 30 N.m (500W) up to 110 N.m (3000W) of torque | Extra unsprung weight is felt more on an already heavy fat bike |
| Mid-drive motor | Not offered as a fat-bike-specific MTX kit; would need a compatible bottom bracket and chainring clearance | Uses the bike's own gears, which wear faster under high-torque soft-terrain starts |
The direct-drive motor's extra weight is the trade-off: on a fat bike it adds to an already substantial rotating mass, so choose the power you actually need rather than the biggest kit, and always fit the two torque arms included with the kit.
What power to choose for a fat bike
Fat bikes have higher rolling resistance than standard bikes due to the larger tyre contact area and higher bike weight (a fat bike typically weighs 15–20 kg before the kit, and 18–24 kg after). This means you need more power for the same performance you'd expect from a standard MTB conversion.
| Kit power | Suited for fat bike | Notes |
|---|---|---|
| 250W | Flat terrain, low speeds | Limited; motor stressed on more demanding terrain |
| 500W | Mixed terrain, packed snow | Recommended minimum (27.5" and 29" only); fit the included torque arms |
| 1000W | Loose snow, hills, rough trails | Optimal for real fat bike use |
| 1500W+ | Extreme conditions, cargo | Maximum for heavy fat bikes or very difficult terrain |
As a rule of thumb, if most of your riding is on packed trails, gravel or hard-packed snow, 500W is workable. If you're regularly pushing through loose sand, deep unpacked snow or steep loose climbs, budget for 1000W — the extra headroom means the motor isn't constantly working at its limit, which also protects the controller and the battery from sustained high current draw. For power-selection logic that applies beyond fat bikes too, see our guide to choosing conversion kit power.
Battery for an electric fat bike
Fat bike energy consumption is higher than a standard MTB under the same conditions due to greater rolling resistance — riding through snow or sand can push consumption to 20–30 Wh/km or more, well above the 10–15 Wh/km typical of a standard e-bike on flat pavement (see our real-world range guide for the general formula). Choose a battery with more capacity than you would for a standard MTB:
- 500W fat bike kit: minimum 48V 17.5Ah
- 1000W fat bike kit: minimum 48V 22.5Ah
- 1500W fat bike on extreme terrain: 52V or higher capacity
Between downtube and triangle mounting, fat bike frames often have more room in the front triangle than a standard MTB, since the frame is built around wide tyre clearance rather than a tight silhouette. A triangle battery can be a practical option if your frame has the bottle-mount bosses for it, giving you more usable capacity without extending the wheelbase or adding a rack. Whichever you choose, browse the full battery range for exact capacities and current pricing, and see our guide on battery lifespan and maintenance to keep whichever pack you choose performing well for years.
Real-world range on a fat bike
Because rolling resistance on snow, sand and mud is so much higher than on pavement, don't expect fat bike range to match the numbers quoted for a standard MTB conversion with the same battery. As a working estimate:
- Packed trail or gravel: roughly 15–20 Wh/km, similar to a loaded standard e-bike
- Soft snow or loose sand: roughly 25–35 Wh/km, sometimes higher in deep unpacked conditions
- Mixed winter commuting: plan around 20 Wh/km as a safe planning number
Applying the range formula (battery Wh ÷ consumption in Wh/km) to a 48V 22.5Ah pack (1,080Wh) at 25 Wh/km gives roughly 43 km on difficult terrain — noticeably less than the 75–90 km estimated for the same battery in mixed riding with a standard kit. Plan your battery capacity around your worst realistic terrain, not your best-case flat-road number, and always carry a margin on longer winter outings when cold temperatures also reduce available capacity.
Riding a fat bike conversion in winter
Fat bikes are frequently bought specifically for snow riding, which means the conversion often needs to perform in conditions that are hardest on both the motor and the battery.
- Tyre pressure: drop to 5–8 psi on soft snow for maximum flotation; this also increases rolling resistance and consumption, so factor it into your range planning
- Battery cold performance: lithium-ion cells temporarily lose 10–20% of usable capacity below 5°C; keep the battery insulated where practical and bring it indoors between rides rather than leaving it on the bike in freezing temperatures overnight
- Motor and connector moisture: melting snow means more water exposure than typical trail riding; check connector seals periodically and dry the bike down after a ride in wet snow
- Traction and torque: snow reduces wheel slip less than you'd expect on packed conditions, which is exactly why the torque arm matters even more in winter use
For the full set of cold-weather storage and care steps — charge level for storage, indoor vs outdoor parking, and how to bring a battery back after a cold spell — see our dedicated winter e-bike maintenance guide. We keep that level of detail there rather than repeating it in every guide, but the short version is: don't store a battery outside in freezing temperatures, and don't charge a battery that's still cold from a ride.
Installation notes specific to fat bikes
The install process is the same core sequence as any hub motor kit — remove the old wheel, fit the new motor wheel, connect the controller, mount the display and throttle/pedal-assist sensor — but a few points deserve extra attention on a fat bike:
- Check fender and frame clearance first. Motor stator housings are typically a little wider than a standard hub shell; on frames with tight tyre-to-chainstay clearance (already minimal on some fat bikes), confirm there's room before you start.
- Fit the torque arm before final axle tightening. It's much easier to align the torque arm against the dropout while the axle nuts are still loose than to retrofit it afterward.
- Re-check disc rotor alignment. Because the motor axle sits slightly differently than the original hub, the rear rotor may need a minor caliper adjustment to avoid rubbing.
- Route cables away from moving snow/mud spray. Fat bikes throw more debris off the tyre than a standard bike; keep the controller and connectors positioned high and secured, not dangling near the tyre's spray zone.
- Torque the axle nuts to spec, then re-check after the first ride. The extra torque a fat bike transmits means it's worth confirming nothing has shifted after the first real outing, even with the torque arm fitted.
If you'd like the full generic installation walkthrough with photos and torque values, our step-by-step kit installation guide covers the base procedure that applies to any bike, fat bike included.
Ongoing maintenance for a fat bike conversion
Because fat bikes are often used in wet, gritty or freezing conditions, a conversion kit on a fat bike benefits from slightly more frequent checks than the same kit on a fair-weather commuter bike. Inspect the torque arm and axle nuts for movement every few rides in heavy conditions, keep connectors clean and dry, and watch for any of the ten most common conversion kit issues covered in our common conversion kit problems guide. For the full maintenance schedule — cleaning intervals, connector care, controller checks — see the complete conversion kit maintenance guide.
Fat bike checklist before ordering
- Rim diameter: 26", 27.5" or 29"? (read from the tyre sidewall — e.g. "26 x 4.0")
- Rear dropout width: measure — 135mm standard or wider?
- Axle type: QR (lever) or thru-axle (key)? If thru-axle, note the diameter and thread
- Disc brake clearance: confirm there's room for a slightly wider hub shell
- Kit power: minimum 500W for real fat bike use, 1000W for loose snow/sand or hills (on a 26" rim at least 1000W, since the 500W kit is not made in 26")
- Torque arms: two are included with every MTX kit — from 1000W upward fitting them is mandatory, not optional
- Battery: choose larger capacity than for a standard MTB, and plan range around your worst terrain
- Winter use plan: if riding in snow, review cold-weather battery care before your first freeze
If your fat bike has dropouts wider than 135mm or a thru-axle, send us the specs — we’ll check compatibility and recommend the right solution. New to conversion kits generally? Start with our beginner's guide for the full picture before you order.
Contact us → Browse e-bike parts →Frequently asked questions
What wheel size do fat bikes use?
Fat bikes typically use 26-inch wheels with wide tyres (3.8–5 inches) or 27.5-inch wheels with 3.5–4-inch tyres. The rim diameter (26" or 27.5") determines kit compatibility. Read the tyre sidewall — for example "26 x 4.0" means a 26-inch rim with a 4-inch tyre.
Is the torque arm mandatory on a fat bike?
Yes. From 1000W upward fitting it is mandatory, and every MTX kit includes two torque arms with clamps at no extra cost. Fat bikes provide superior traction due to their wide tyres, which means higher torque at the wheel. The torque arm prevents the motor axle from spinning in the dropout and protects both the frame and the motor in the long run.
What motor power do you recommend for a fat bike conversion?
Depends on use. For light trails and packed snow, 500W is adequate (the 500W kit comes in 27.5" and 29" only; on a 26" rim choose at least 1000W). For rough terrain, loose snow or extra load, 1000W is the recommended minimum. Fat bikes have higher rolling resistance due to their wide tyres, so they need more power than a standard bike for equivalent performance.
Can I use a thru-axle fat bike with a standard conversion kit?
It depends on the axle diameter and thread. Standard MTX kits are built around quick-release dropouts. If your fat bike uses a thru-axle, measure the diameter and the distance between dropout faces and contact us before ordering so we can confirm fit or suggest an alternative.
Does a fat bike conversion get less range than a normal e-bike?
Yes, noticeably. Rolling resistance on snow or sand is much higher than on pavement, so consumption can rise from a typical 10–15 Wh/km to 25–35 Wh/km on soft terrain. Plan your battery capacity around your worst realistic riding conditions, not flat-road figures.
Should I choose a geared hub motor or direct-drive for a fat bike?
MTX kits use a gearless direct-drive motor, so that is the option we offer. A geared hub is lighter and has strong low-speed torque, but its internal nylon gears wear over time; the direct-drive motor has no gears to wear and runs near-silent, at the cost of extra weight on an already heavy fat bike.
Does cold weather affect a fat bike's electric conversion?
Yes. Below 5°C, the battery temporarily loses 10–20% of usable capacity, and the pack should be brought indoors between rides rather than left outside in freezing conditions. See our winter e-bike maintenance guide for the full cold-weather care routine.
Reviews